How The Proxy by DSL Rentals and GeeLark Work Together to Boost Your Business
In this guide, we’ll show you how to connect panel.dslrentals.com with Geelark.com, providing a smooth and efficient way to manage your proxies and automate tasks.
What is GeeLark?
GeeLark is the first anti-detect phone solution, ideal for managing multiple mobile accounts without restrictions and serving as a perfect alternative to Android emulators. It is perfect for traffic arbitrage, account farming, social media management, and any situation where you need to run mobile apps across multiple phones. GeeLark also includes a fully-featured anti-detect browser, giving you two powerful tools in a single platform.
- Remotely control multiple Android phones from a PC
- Each phone has unique parameters, appearing as a different device to apps and websites
- Automate tasks using the synchronizer and AI-powered automation tools
- Efficient team collaboration with role assignments and permission controls
Using Panel Proxies with GeeLark
Integrating panel.dslrentals.com proxies with GeeLark provides powerful advantages for managing cloud phones and automating tasks:
- Unique IP for each cloud device – every virtual phone gets its own dedicated IP for maximum anonymity
- Full control and automation – manage each profile effortlessly through API integration
- Large pool of IP addresses – access tens of thousands of residential, mobile, and datacenter IPs for any scale of operation
- Seamless API integration – easily connect and automate all actions between proxies and GeeLark
- High reliability and uptime – stable connections ensure uninterrupted task execution
- Flexible usage across regions – rotate IPs to simulate real users from multiple locations
How to Set Up Panel Proxies with GeeLark
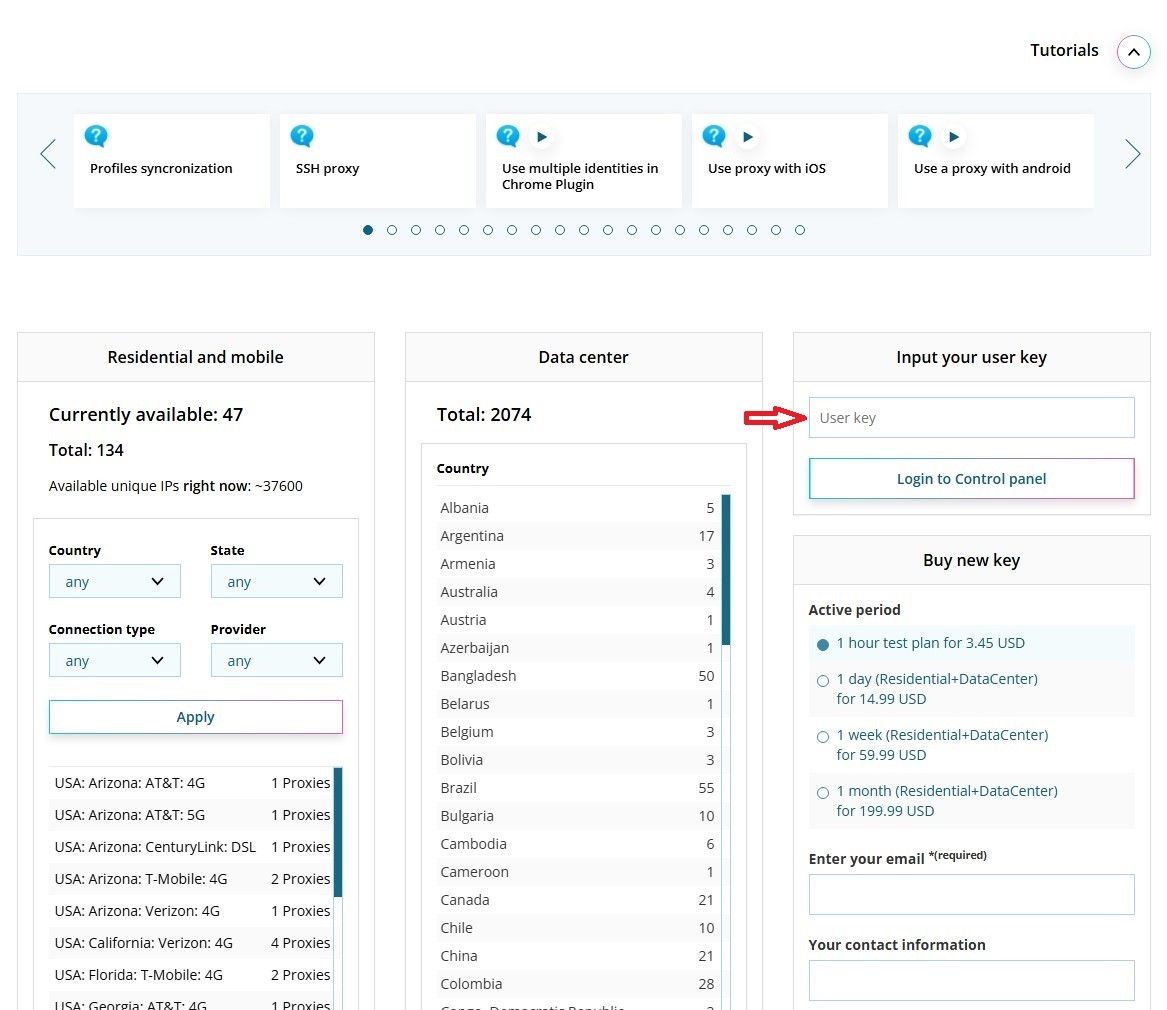
Step 1: Log in to the Panel
- Go to panel.dslrentals.com
- Enter the key in the appropriate field and click the “Login to Control panel” button
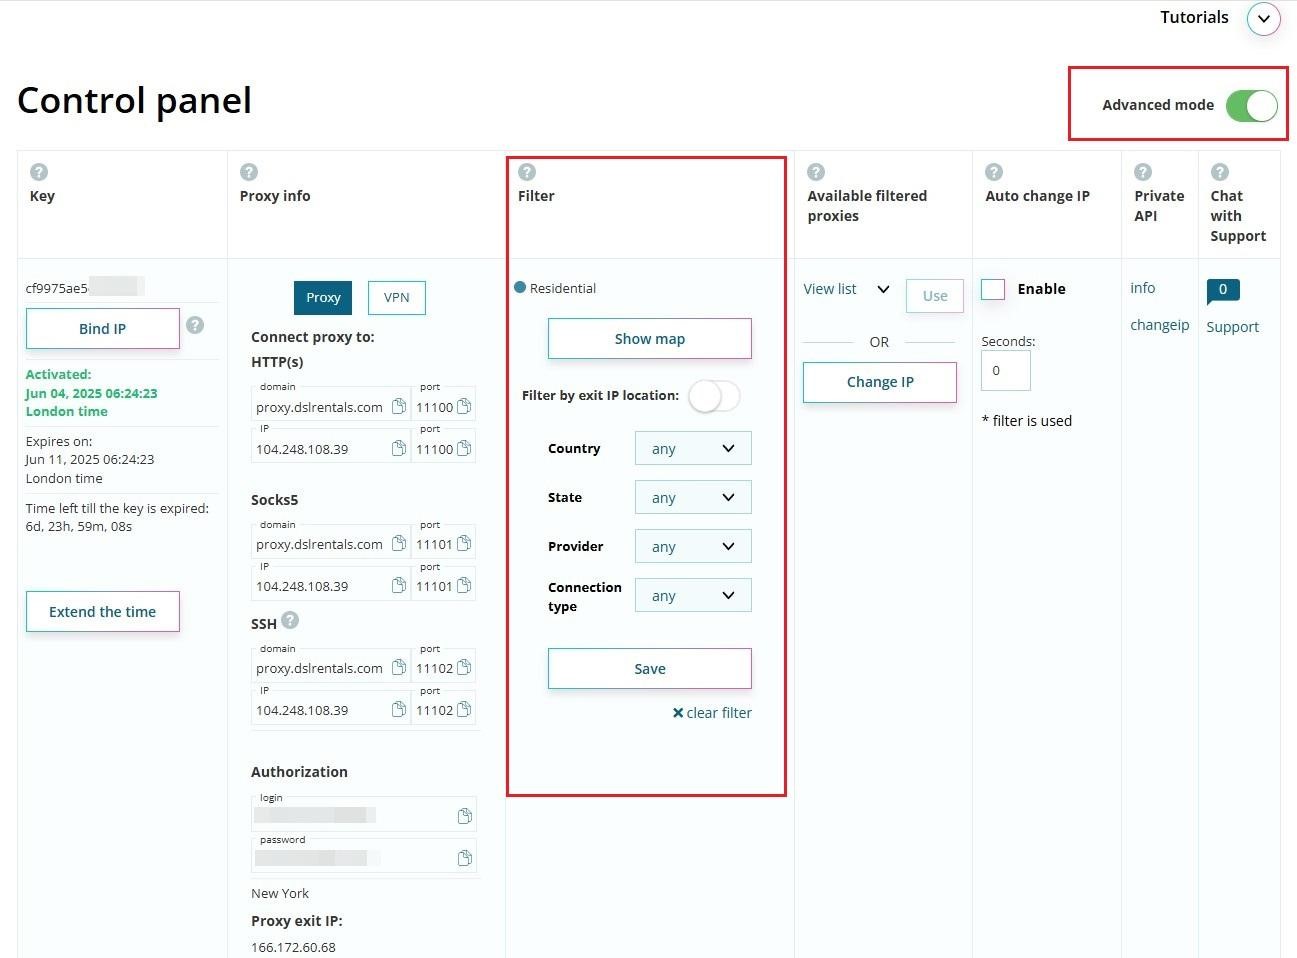
Step 2: Setting up Control Panel
- Click the Change IP button to activate your key
- Turn on the toggle to enable Advanced Mode
- Select the required filter
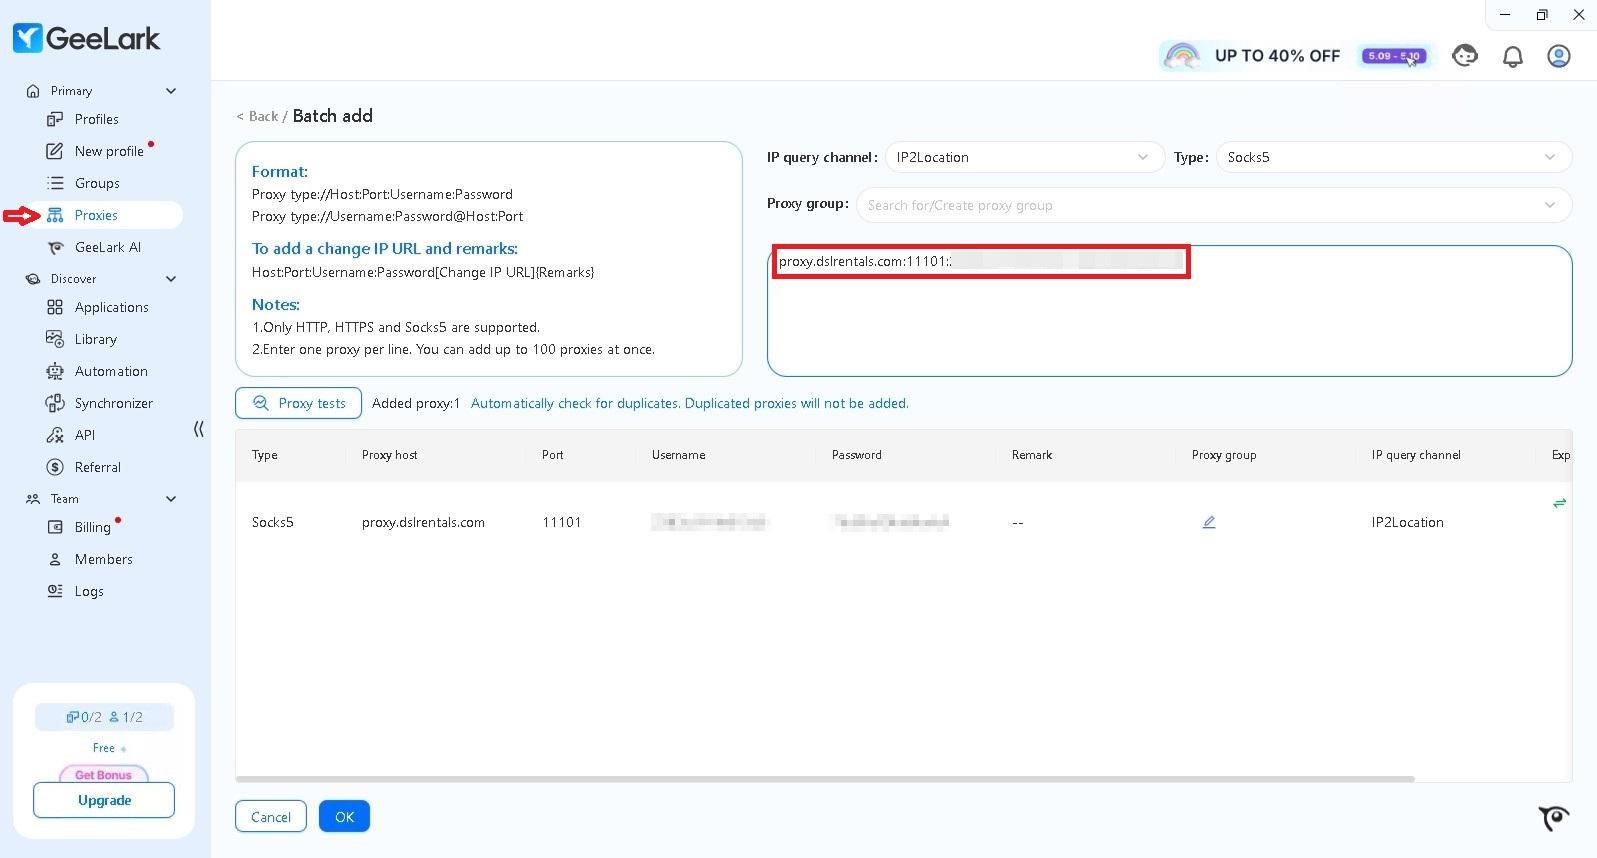
Step 3: Configure Panel Proxy in GeeLark
- Log in to Geelark and click the “Proxies” button, as shown in the following figure
- Enter proxy data in the proper format
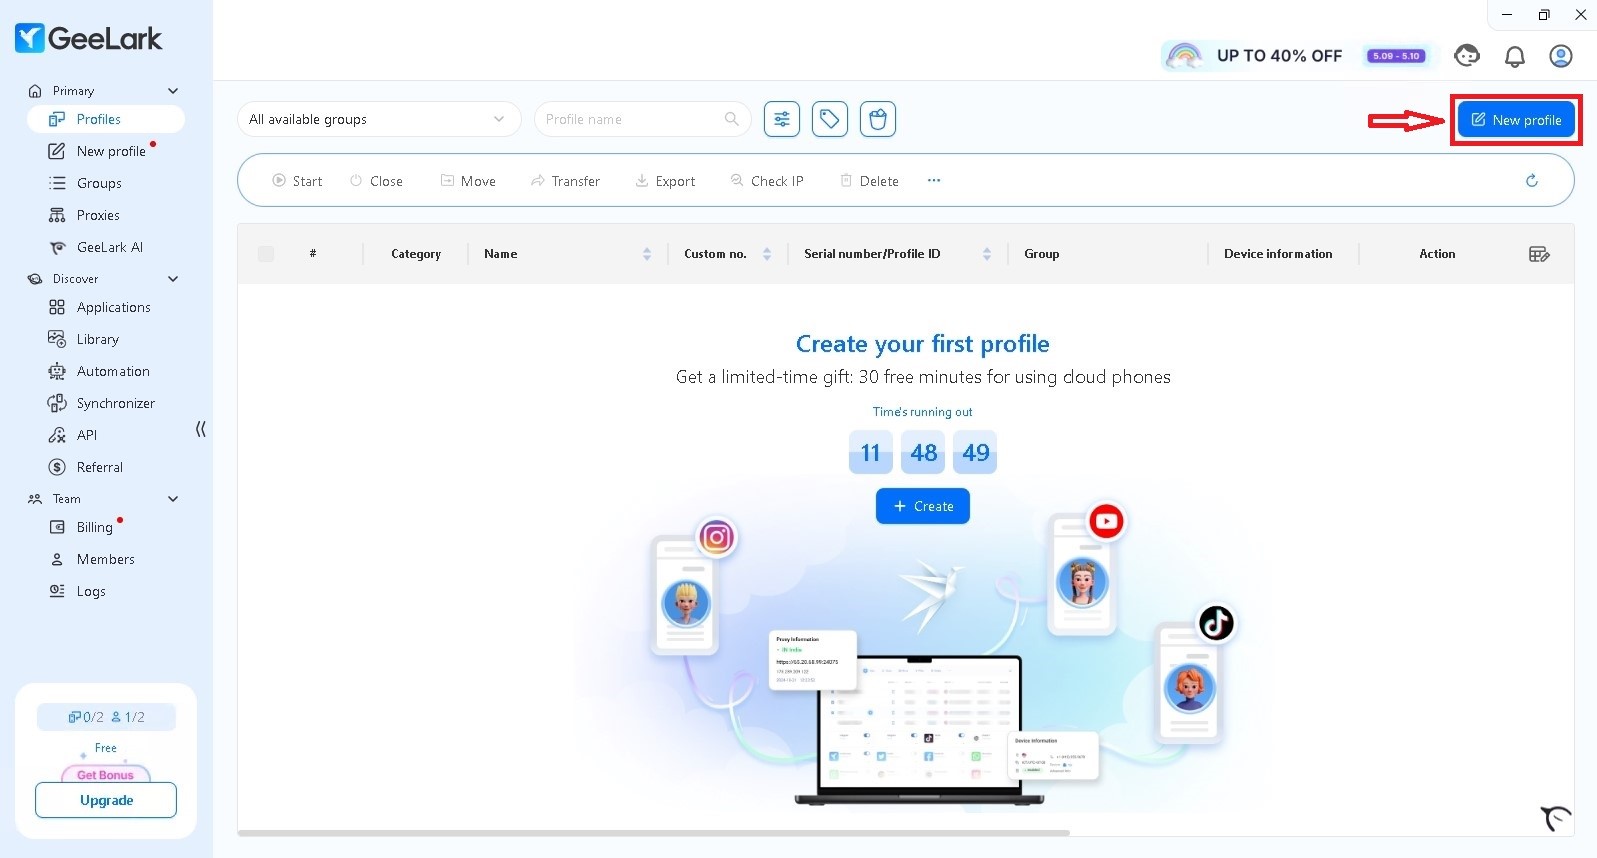
Step 4: Create a Profile
- Go to the Profile section and click New Profile
Step 5: Setting Up a Profile
- Select the Saved section and choose the required proxy from the list
- Check the proxy by clicking Check Proxy and then click Create
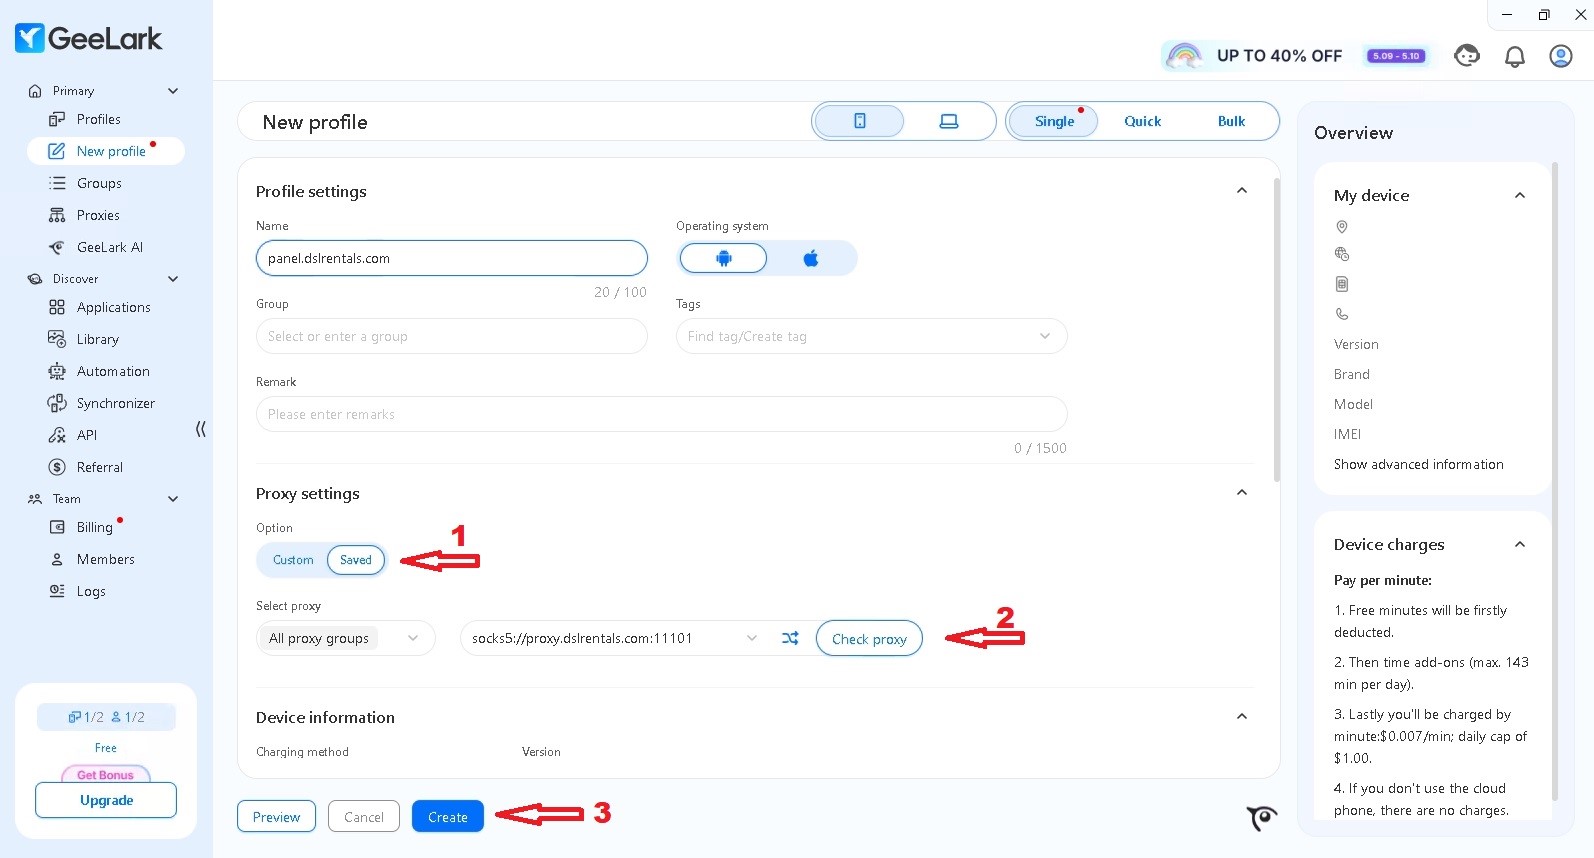
Step 6: Launch Profile
- Click the Start button to launch the proxy
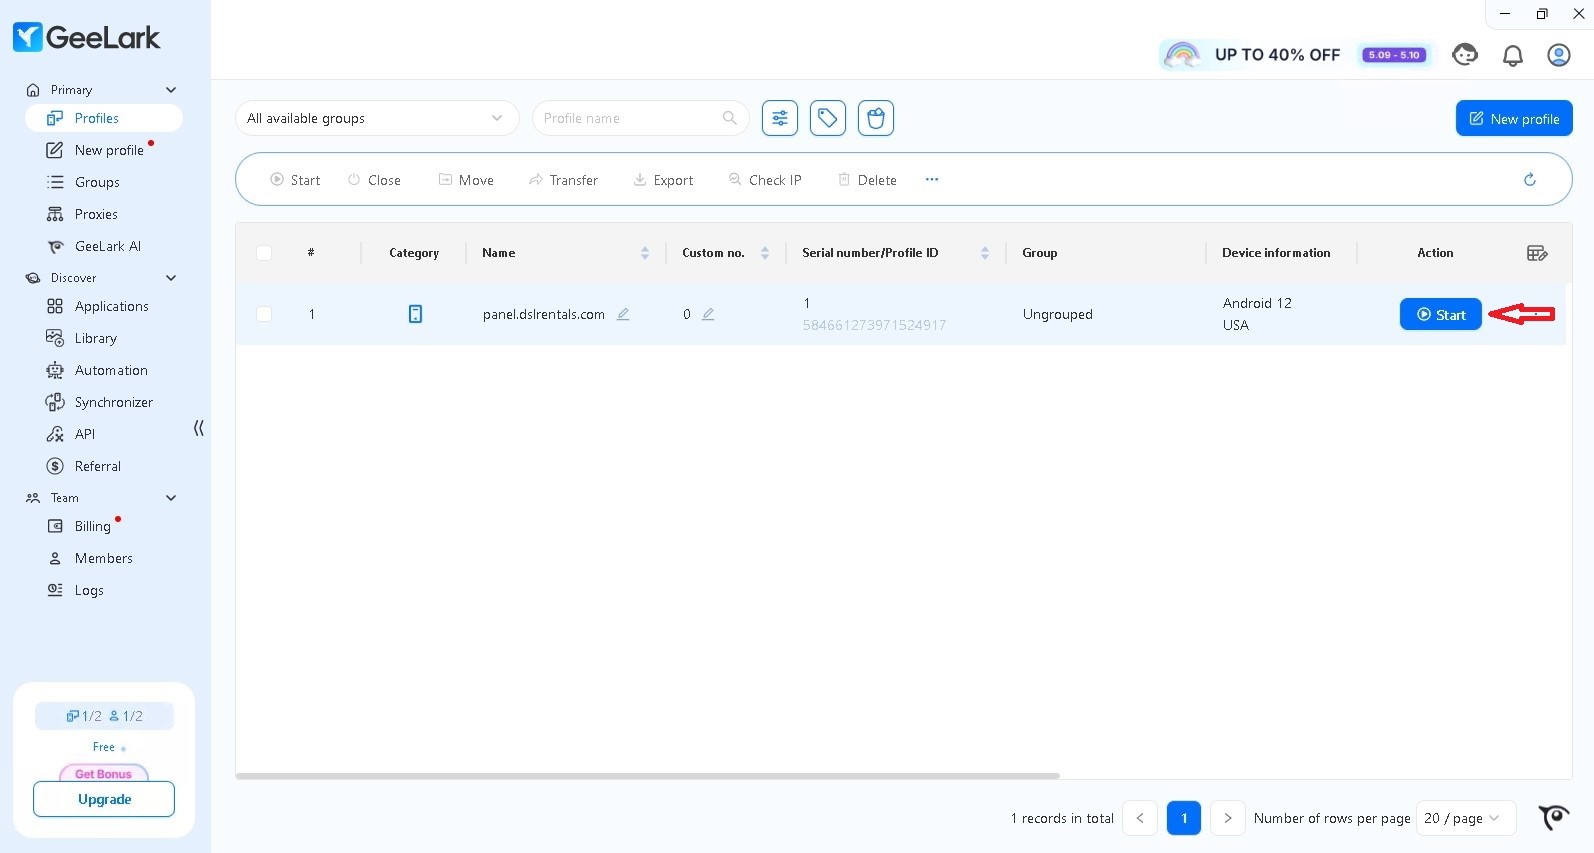
All set! The proxy from The Proxy by DSL Rentals is now configured in your GeeLark profile, and you can start working. Enjoy using the service!
Register here and enter the promo code DSL15 during payment to receive a 15% discount for new subscribers. This discount can be combined with the current official discounts.